Recently I’m working on build my own tech blog so I did some google search trying to find a “morden” way to build it. (I have been using Wordpress for some blogs and websites before.) The finnal two are Jekyll and Hugo, which are both Static Site generators with a lot of adoptions. After reading some articales about the comparison and the documentation of these two, I decided to try to build my own blog using Hugo and GitHub Actions.
Prerequisites
- GitHub Account: Need to have a GitHub account to be able to push the blog to Github repository. Free account is enough.
- Git: Need to have Git installed on our machine.
Step 1 - Build the website using Hugo Locally
First of all, we need to build the website using Hugo locally or at least has go throuth the Quickstart guide
Step 1.1 - Install Hugo
According to the OS, we can install Hugo perspectively. For now we are using MacOS:
brew install hugo
Check the version of Hugo:
hugo version
The output should be:
hugo v0.92.0+extended darwin/amd64 BuildDate=unknown
Step 1.2 - Create a new Hugo site, install a theme
Hugo provides a lot of theme to choose from. We are using PaperMod theme, which is responsive and minimal. We also can choose a theme from the Hugo Themes.
First create a new hugo site:
hugo new site <our sitename>
Then install the PaperMod theme:
cd <our sitename>
git init
git submodule add https://github.com/adityatelange/hugo-PaperMod.git themes/PaperMod --depth=1
📝 Note: We can choose to install the themes using Git Clone:
git clone https://github.com/adityatelange/hugo-PaperMod themes/PaperMod --depth=1or choose to install the theme by downloading the zip file: Master Branch (Latest) and extract in the theme folder.
Modify the config.yaml file to add the theme:
theme = "PaperMod"
📝 Note: Hugo support 3 types of config file:
config.toml,config.yamlandconfig.json. We can use one of them as we like. For further refernce, Configure Hugo
Step 1.3 - Add a post
Then add a post:
hugo new posts/<our post name>.md
Add the contents of the post, it should start with the following:
---
title: "<our post name>"
date: 2022-01-19T23:05:28-08:00
draft: true
---
To test the post locally, we need to start a hugo server and publish our post:
hugo server -D
This will start a hugo server and publish the website and then we can visit the site in our browser via the URL: http://localhost:1313/.
📝 Note: The
-Dflag is used to build the site with content marked as draft. If we have finished draft the post and want to publish it to the site, we need to remove thedraft: trueor change it todraft: falsein<our post name>.md. For more usage, please check the Basic Usage
After testing the site, now we are ready to dploy the website to our Github repository and Github Pages.
Step 2 - Build the website on GitHub Pages using GitHub Actions
According to GitHub Docs, we can build a user/orgnization site or a project site on GitHub Pages. As for now we would like to build a user site for our personal blog.
And according to GitHub Actions for GitHub Pages, the default config is to use the master branch as the source branch to hold the hugo files and to use the gh-pages branch as the destination branch to hold the published website, both are in the same repository.
But it’s more simple and error avoiding to use a private repository for the source (the hugo files) and a public repository for the published website, for the following reasons:
- Keep the hugo source files in a private repository;
- Avoid the error that will be caused with the
GITHUB_TOKENbecause for the first time of building the site, it will use the master branch to host the site, so we need to config it to use thegh-pagesbranch manually. For futher infomation, refer to First Deployment with GITHUB_TOKEN.
So let’s create some new repositories on GitHub:
Step 2.1 - Create new GitHub repositories
Create a new private repository for the Hugo files, with a name that we like: ourhugosourcecode.
And create a new public repository for the website, with a name in format: <githubusername>.github.io.
Leave theses repositories empty.
Step 2.2 - Configure Github Tokes for GitHub Actions
Now let’s set up the personal_token:
In our GitHub Settings -> Developer settings -> Personal access tokens, click Generate new token:

Select the repo scope:

Then generate the token and copy the token to our clipboard.
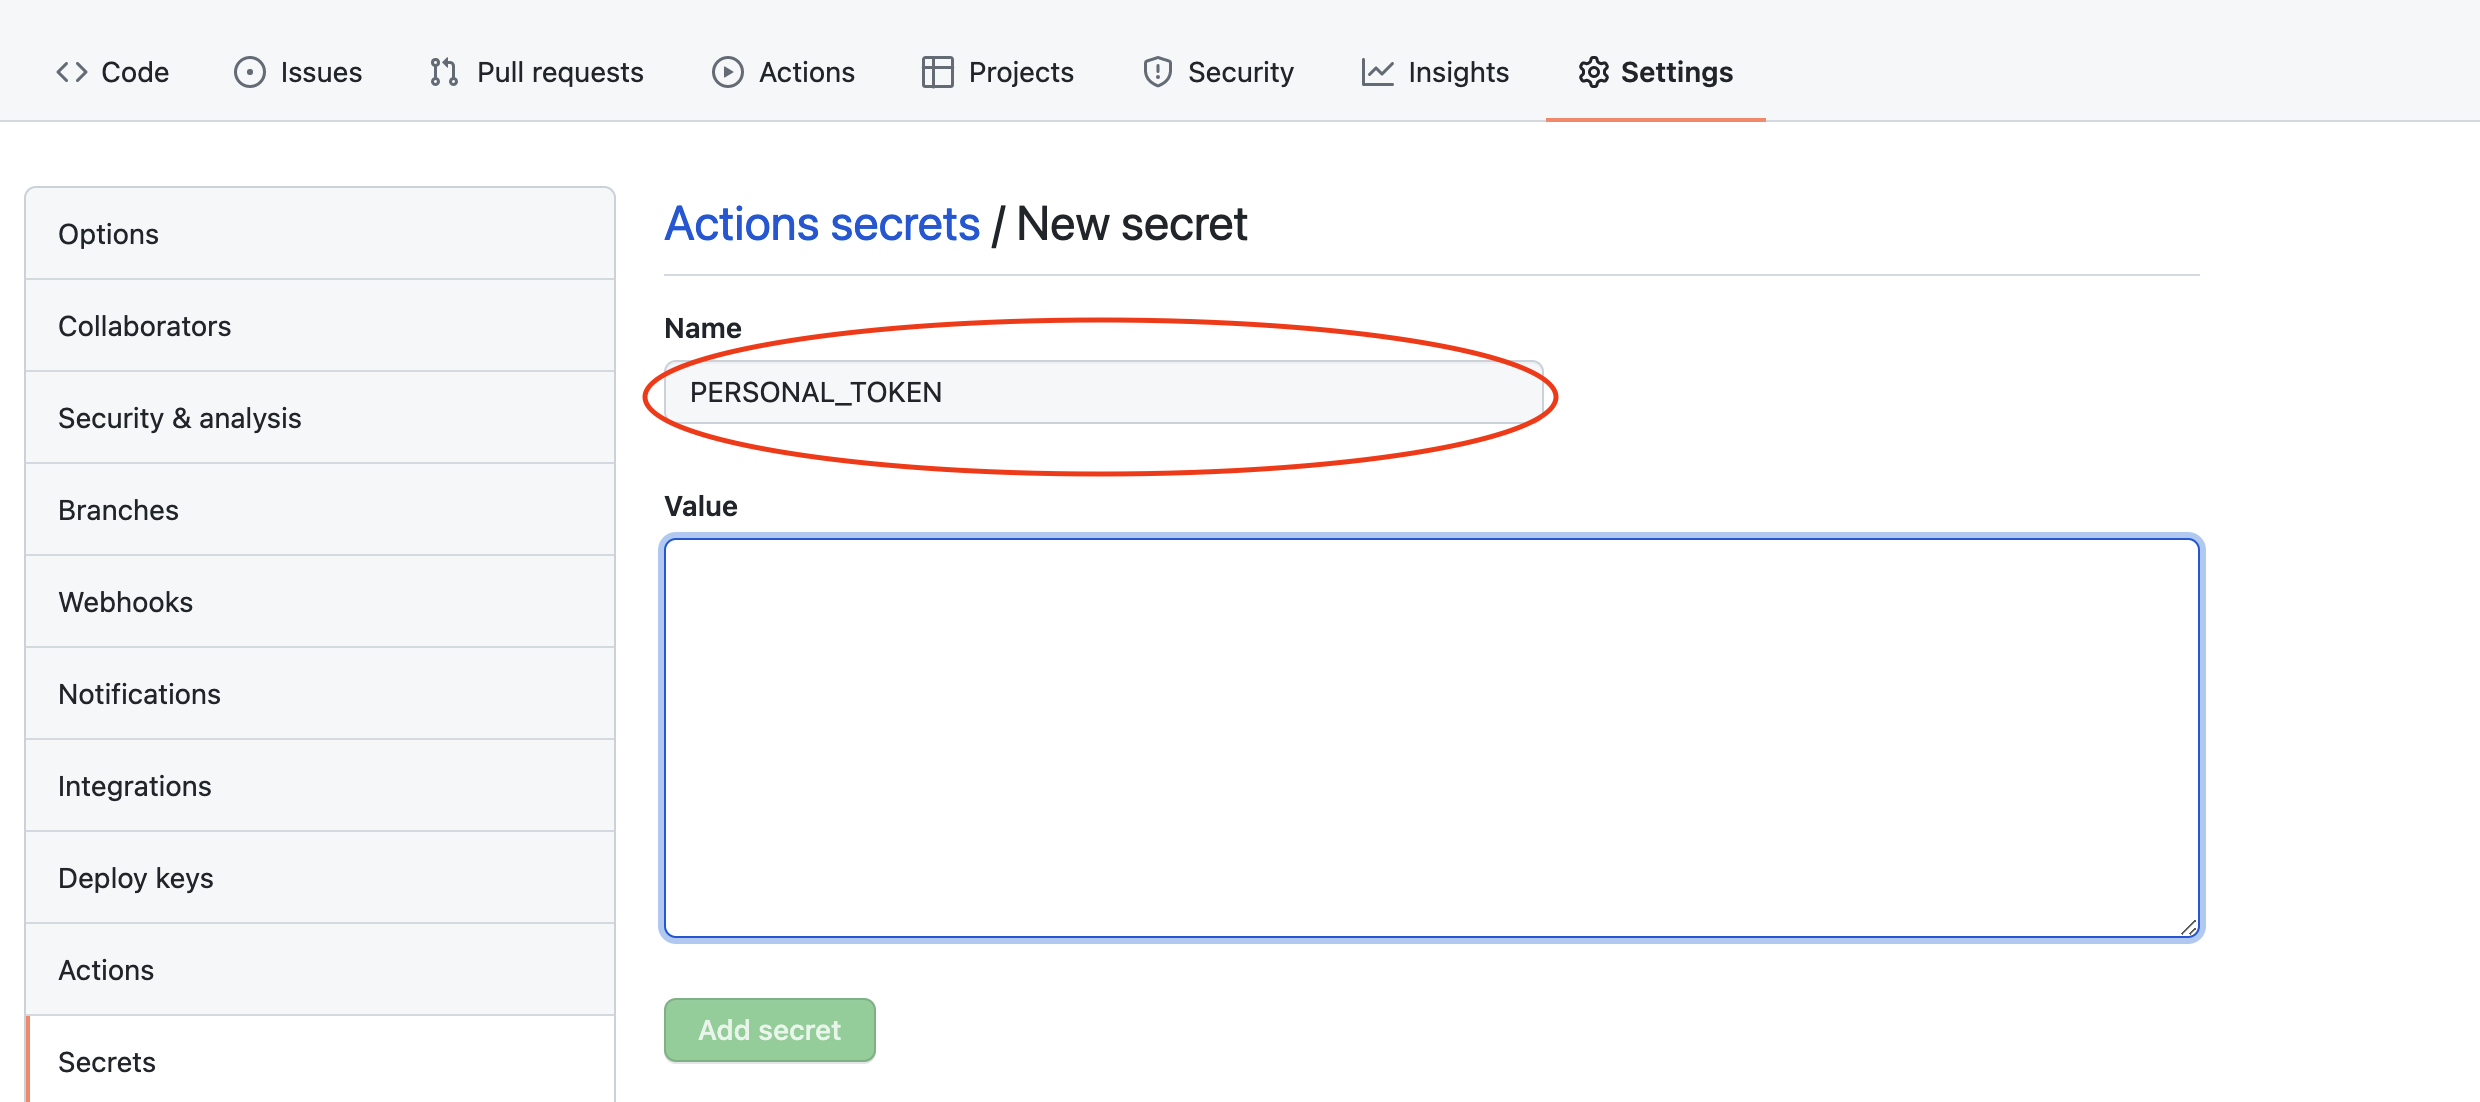
In the private ourhugosourcecode repositoty Settings -> Secrets, click New repository secret:

add the Personal access token we just generated (in clipboard) as serect value and set the name PERSONAL_TOKEN:
Step 2.3 - Setup GitHub Workflow
Add our workflow file .github/workflows/gh-pages.yml to our local repository with following contents:
name: github pages

on:
  push:
    branches:
      - master  # Set a branch to deploy

jobs:
  deploy:
    runs-on: ubuntu-latest
    steps:
      - uses: actions/checkout@v2
        with:
          submodules: true  # Fetch Hugo themes (true OR recursive)
          fetch-depth: 0    # Fetch all history for .GitInfo and .Lastmod

      - name: Setup Hugo
        uses: peaceiris/actions-hugo@v2
        with:
          hugo-version: 'latest'
          extended: true

      - name: Build
        run: hugo --minify

      - name: Deploy
        uses: peaceiris/actions-gh-pages@v3
        with:
          personal_token: ${{ secrets.PERSONAL_TOKEN }} # The personal token for the GitHub Actions
          external_repository: <githubusername>/<githubusername>.github.io  # The external repository to deploy
          publish_dir: ./public # The directory to deploy, default is public folder
          full_commit_message: ${{ github.event.head_commit.message }}
          # cname: <our custom domain>
📝 Note: The
full_commit_messageis used to set the commit message when we push to themasterbranch, by using this setting, we can use the commit message from the push event in the public repo and avoid the ugly commit message with/that system will use. Thecnameis used to set the CNAME file for the website, if we don’t use a custome domain for our website, we need to comment out this line.
Step 2.4 - Configure baseURL
Because the github pages will use the url <githubusername>.github.io, so we need to set the baseURL in the config.yaml file:
baseURL: "https://<githubusername>.github.io"
Step 2.5 - Deploy the website
Now push the repository to the master branch and GitHub Actions will deploy the website automatically.
We can check the process at 2 locations:
- In
hugo source fileprivate repo, click theActions, we will see thegithub pagesworkflow successfully deployed:

- In
<githubusername>/<githubusername>.github.iopublic repo, click theActions, we will see thegithub pagesworkflow successfully deployed:

Step 2.6 - Check the website
Now we can visit the website in the browser via the URL: http://<githubusername>.github.io/.
Step 2.7 - Continue add more posts
From now on, we can add more posts to the website. As soon as we test locally the website, we can push the repository to the ourhugosourcecode repo and GitHub Actions will deploy the website automatically.
Optional - Using a custom domain
GitHub Pages comes with a URL like <githubusername>.github.io, but we can also use a custom domain. To achive this, please refer to the Google Pages documentation: Configuring a custom domain.
What need to be mentioned here is that although after successfully setup a custom domain for the website, by which Google will automatically create a CNAME file for the website in our public repository root, with the custom domain we set, after doing any update by pushing to this repository, the file will be deleted by the push. So we need to add a line to our gh-pages.yaml file to set the cname, after this modification the config.yaml file will be:
name: github pages

on:
  push:
    branches:
      - master  # Set a branch to deploy

jobs:
  deploy:
    runs-on: ubuntu-latest
    steps:
      - uses: actions/checkout@v2
        with:
          submodules: true  # Fetch Hugo themes (true OR recursive)
          fetch-depth: 0    # Fetch all history for .GitInfo and .Lastmod

      - name: Setup Hugo
        uses: peaceiris/actions-hugo@v2
        with:
          hugo-version: 'latest'
          extended: true

      - name: Build
        run: hugo --minify

      - name: Deploy
        uses: peaceiris/actions-gh-pages@v3
        with:
          personal_token: ${{ secrets.PERSONAL_TOKEN }} # The personal token for the GitHub Actions
          external_repository: <githubusername>/<githubusername>.github.io  # The external repository to deploy
          publish_dir: ./public # The directory to deploy, default is public folder
          full_commit_message: ${{ github.event.head_commit.message }}
          cname: <our custom domain> # The custom domain we set
This will create a CNAME file by GitHub Actions for the website in our public repository root everytime we do a push, and the custom domain will be used to access the website.
And also at the same time we need to change the baseURL in the config.yaml file from <githubusername>.github.io to the custom domain, after this config the current config.yaml file should looks like this:
baseURL: "https://<our custom domain>/"
title: <our website title>
theme: PaperMod
Epilogue
Fianlly our website is successfully deployed to GitHub Pages. But this is only the beginning, we can continue to add more posts to the website, and we can also deploy more and more features or try different themes to our website.
Hugo is so many powerful, hope we can find some useful features in it and add it to our website in the furture.